
We all need this sign, right?! I’m so excited to share this super easy project with you, and I’m even more excited for my husband to hang it by our front door!
This project doesn’t require much – a bread / chopping board, some of the $3 Chalk Paint, a fine Artline marker, or similar, some sealer and a small length or rope. That’s it! I purchased 3 of these boards after Christmas, they were marked down, and I couldn’t resist them! You can of course, use any wooden board for this project.
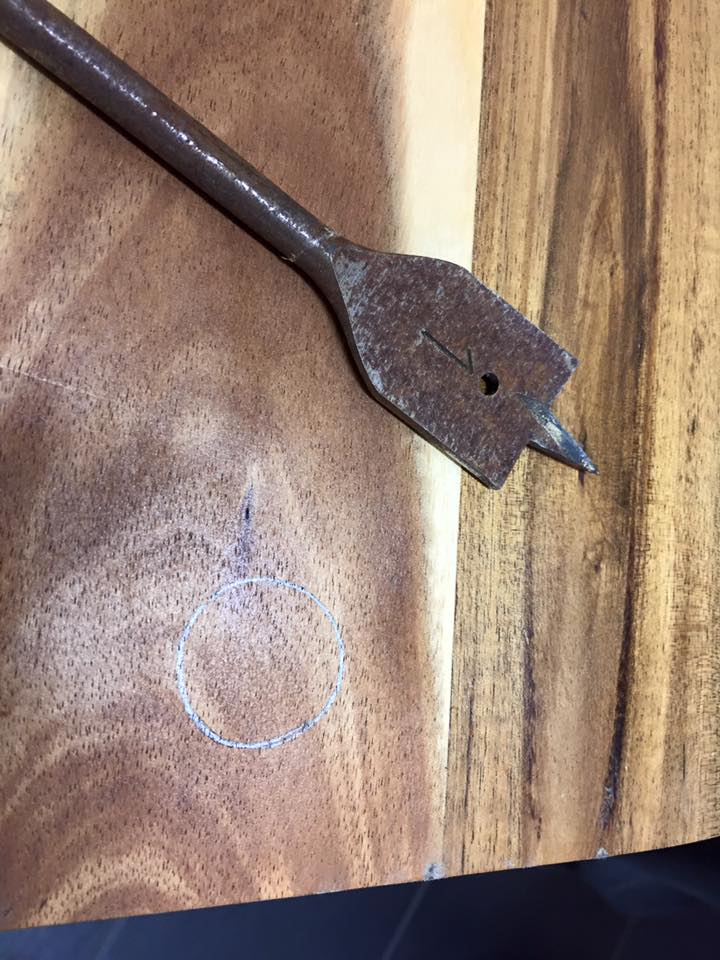
The board I used for this sign already had a hole down one end, so the first thing I did was get my Husband to drill out a hole of the same size, but down the other end – so now I have two holes which I’ll use later for hanging! (If your board doesn’t have any holes, you will have to drill two holes if you wish to hang it!)
Next step is to paint your board. You could of course, sand your board back. In fact, that would probably be advisable – I haven’t simply because the fine dust from sanding affects my breathing and well, basically, I’m all about the easy!
So now you should have a board that’s white, and has one hole either end.
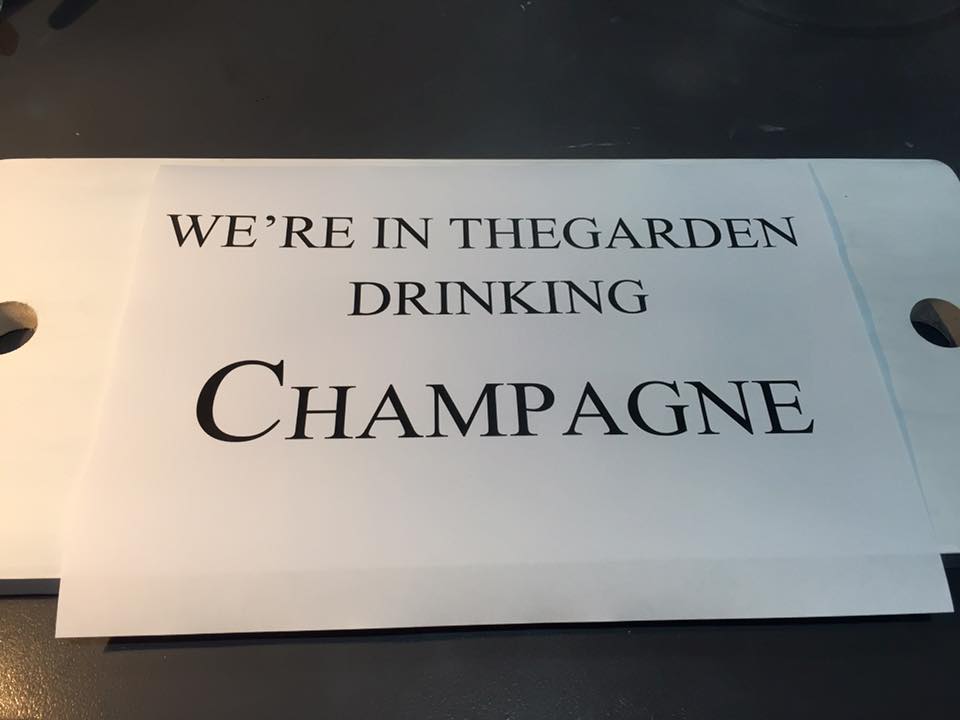
Then you need to make your saying in a program like Microsoft Word, or similar. After I’d printed this one out, I realised I didn’t have a space between the words THE and GARDEN, so I went back to the drawing board and came up with the layout that I eventually used.
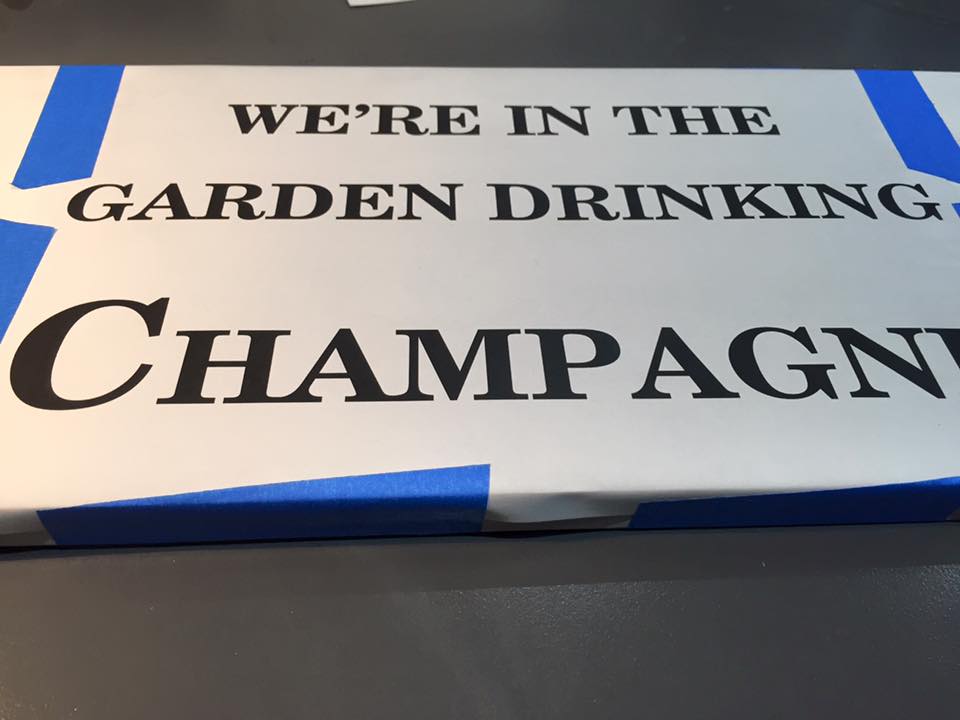
If you want to lay yours out like mine – I used New Century Schoolbook in font size 72 for all the words except Champagne. Then I used New Century Schoolbook in size 150 for the C and New Century Schoolbook in size 100 for the rest of the word. All words were done in BOLD. I set the paper to landscape and set the margins to narrow.
Once you’ve printed it out and you’re happy with it, make sure that it fits on the size of your board.
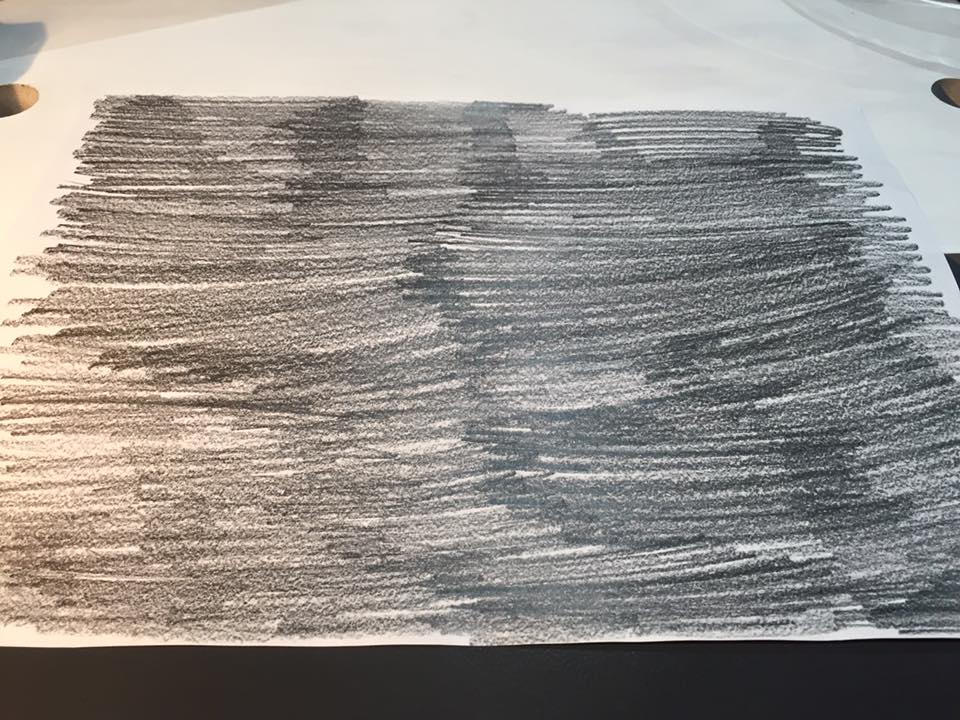
Now turn your printout over so the image is facing down, and using a pencil shade over the entire area where your saying is. I do tend to do this slightly dark because it leaves a better imprint when transferring it to your board.
When that’s done, turn it over and secure it to your board. I find painters tape brilliant for this. Then grab a sharp pen or pencil, (I personally use a pen, I find them finer and they give me a more accurate outline, but it’s up to you!) and start tracing the outline of the letters. I tend to press quite firmly when I’m doing this.
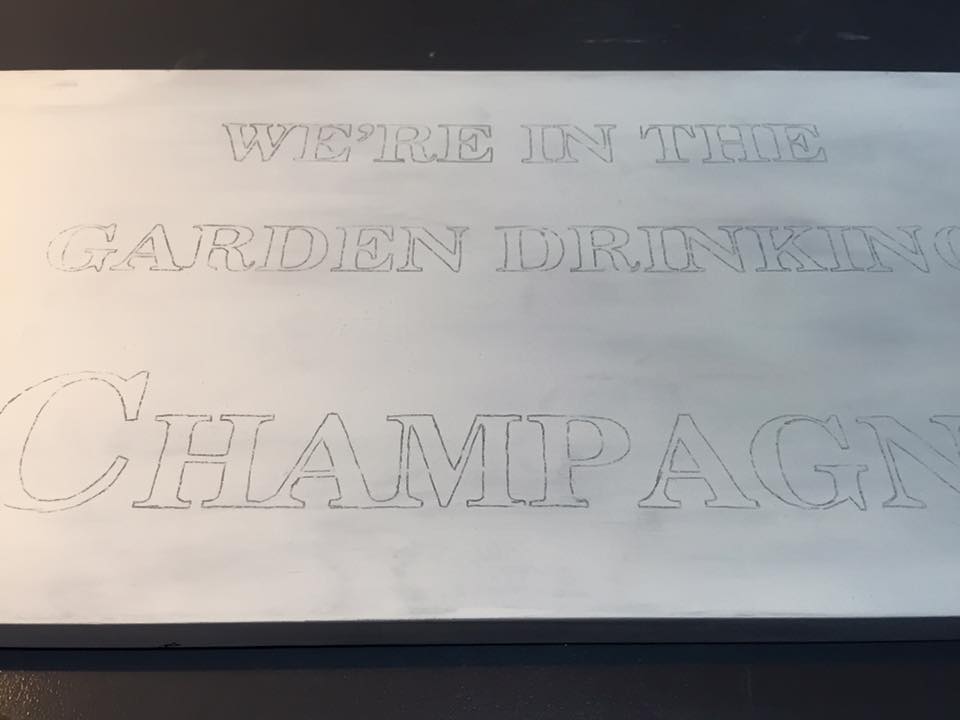
Once you’ve traced all the letters, remove the tape and you’ll see a pretty good imprint of the saying on your board. Now all you have to do is use an Artline / Sharpie etc and colour them in! So much fun!
The easiest way I found to colour the letters in was to outline the letter first, the fill it in and then move to the next letter on the right – just as if you were actually writing – this will prevent any smudging. Once you’ve outlined and filled all the letters, sit the board aside overnight so the ink can dry properly.
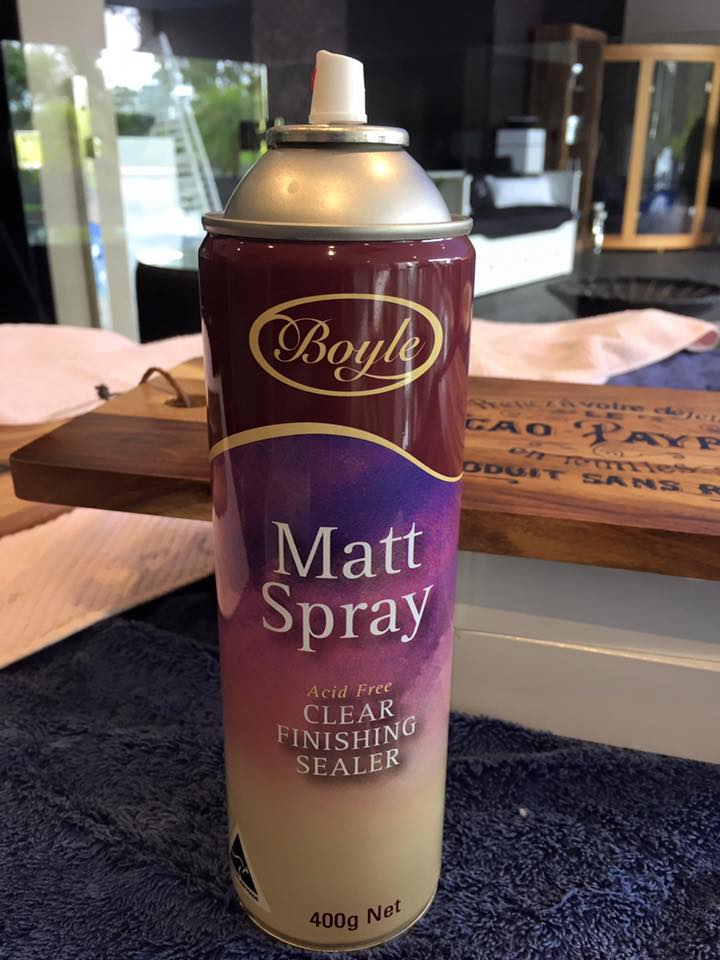
You’re going to need to seal your board once the ink is dry. I use this product available from Bunnings for most of my projects that I seal. It’s about $11, goes a long way and dries to a beautiful matte finish. I would suggest only using a spray sealer – if you want to use a wax or clear varnish, you will have to paint your letters with acrylic paint otherwise the brush strokes will smear the writing) Give your board two or three light coats of sealer and let it dry completely.
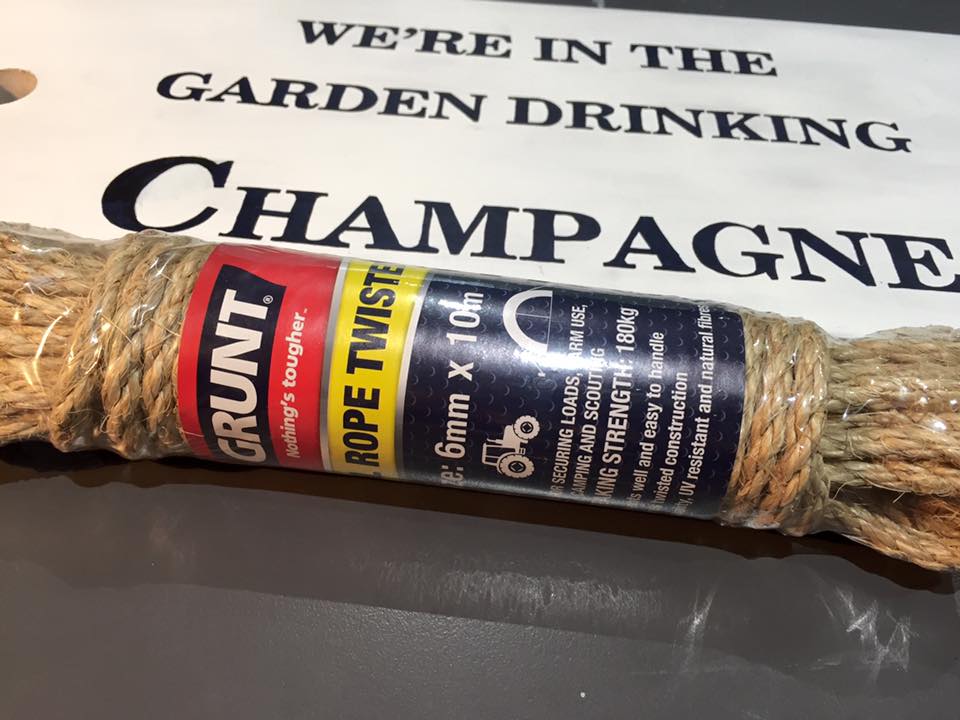
All you have left to do now, is make a rope hanger for it. I used this rope but it’s totally up to you! I think a thick white cotton rope would also look fab!
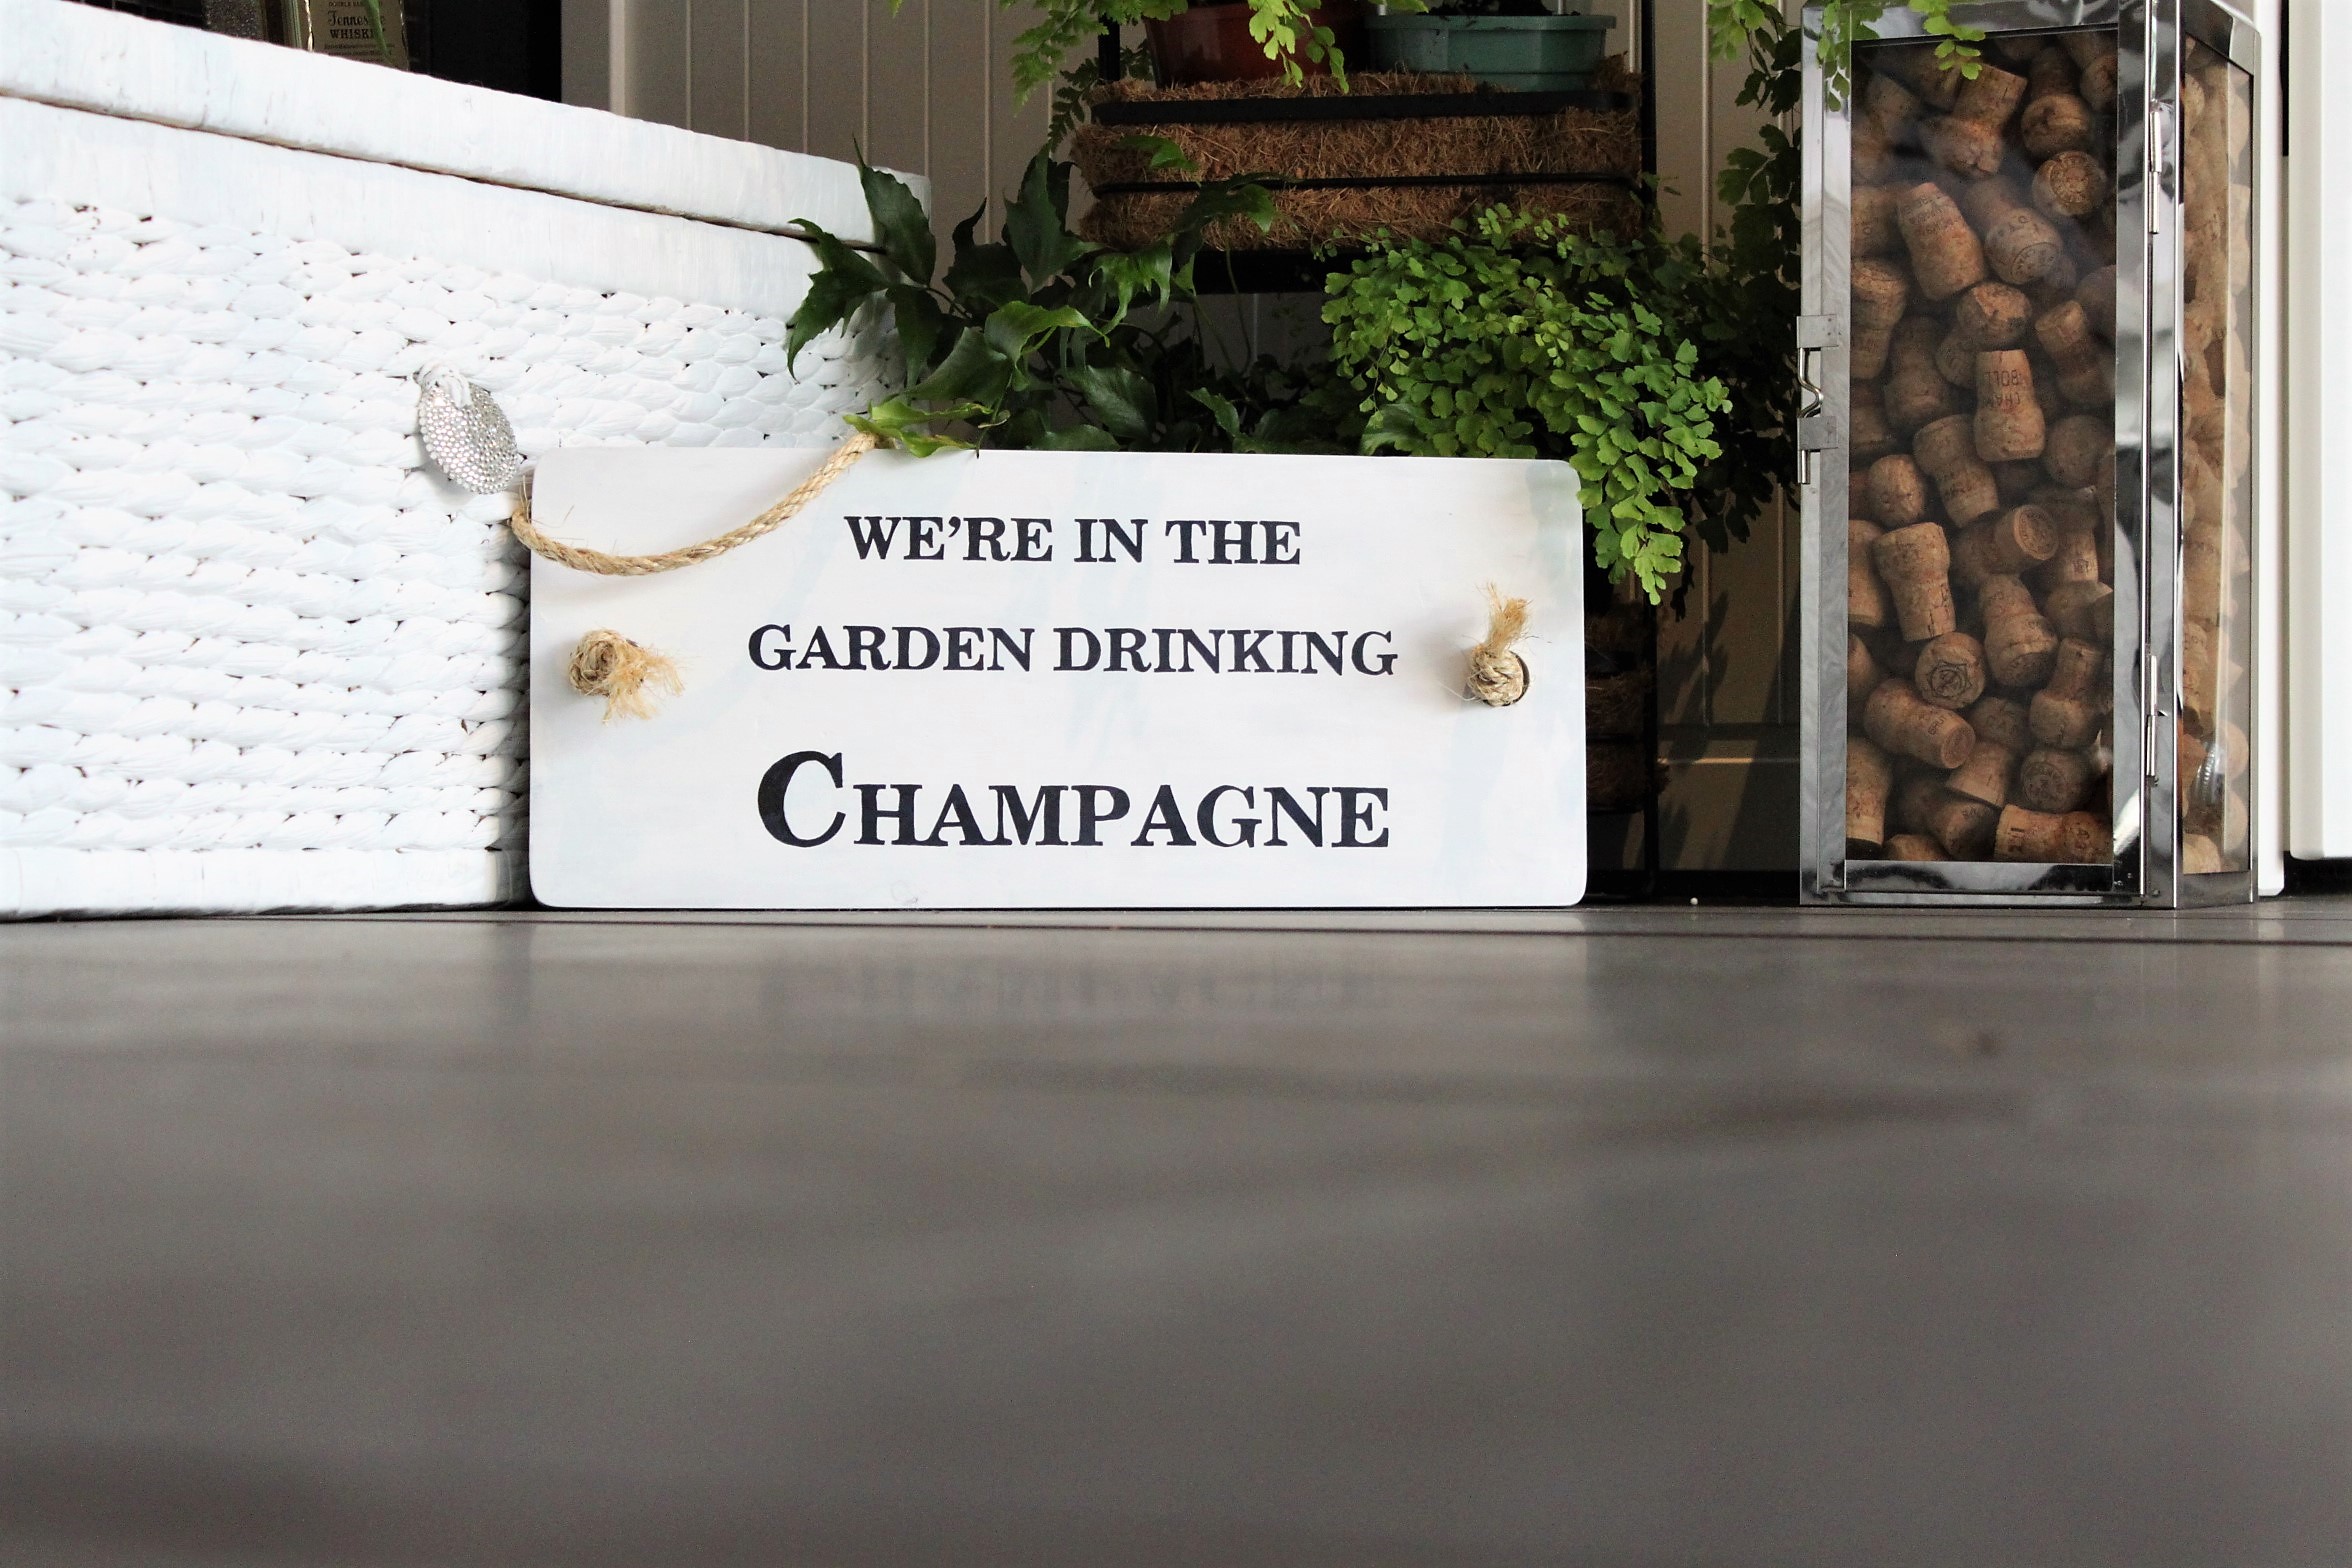
Thread the rope through the holes and tie a double knot at the front of the board. Thread the rope through the other side and also tie a double knot on that end. I popped a bit of E6000 glue on my knots just for peace of mind – I didn’t want the knot coming undone, and my sign falling to the ground!
To give it a bit of charm, I then unravelled the ends of the rope coming out of the knots and frayed them and trimmed them a fraction.
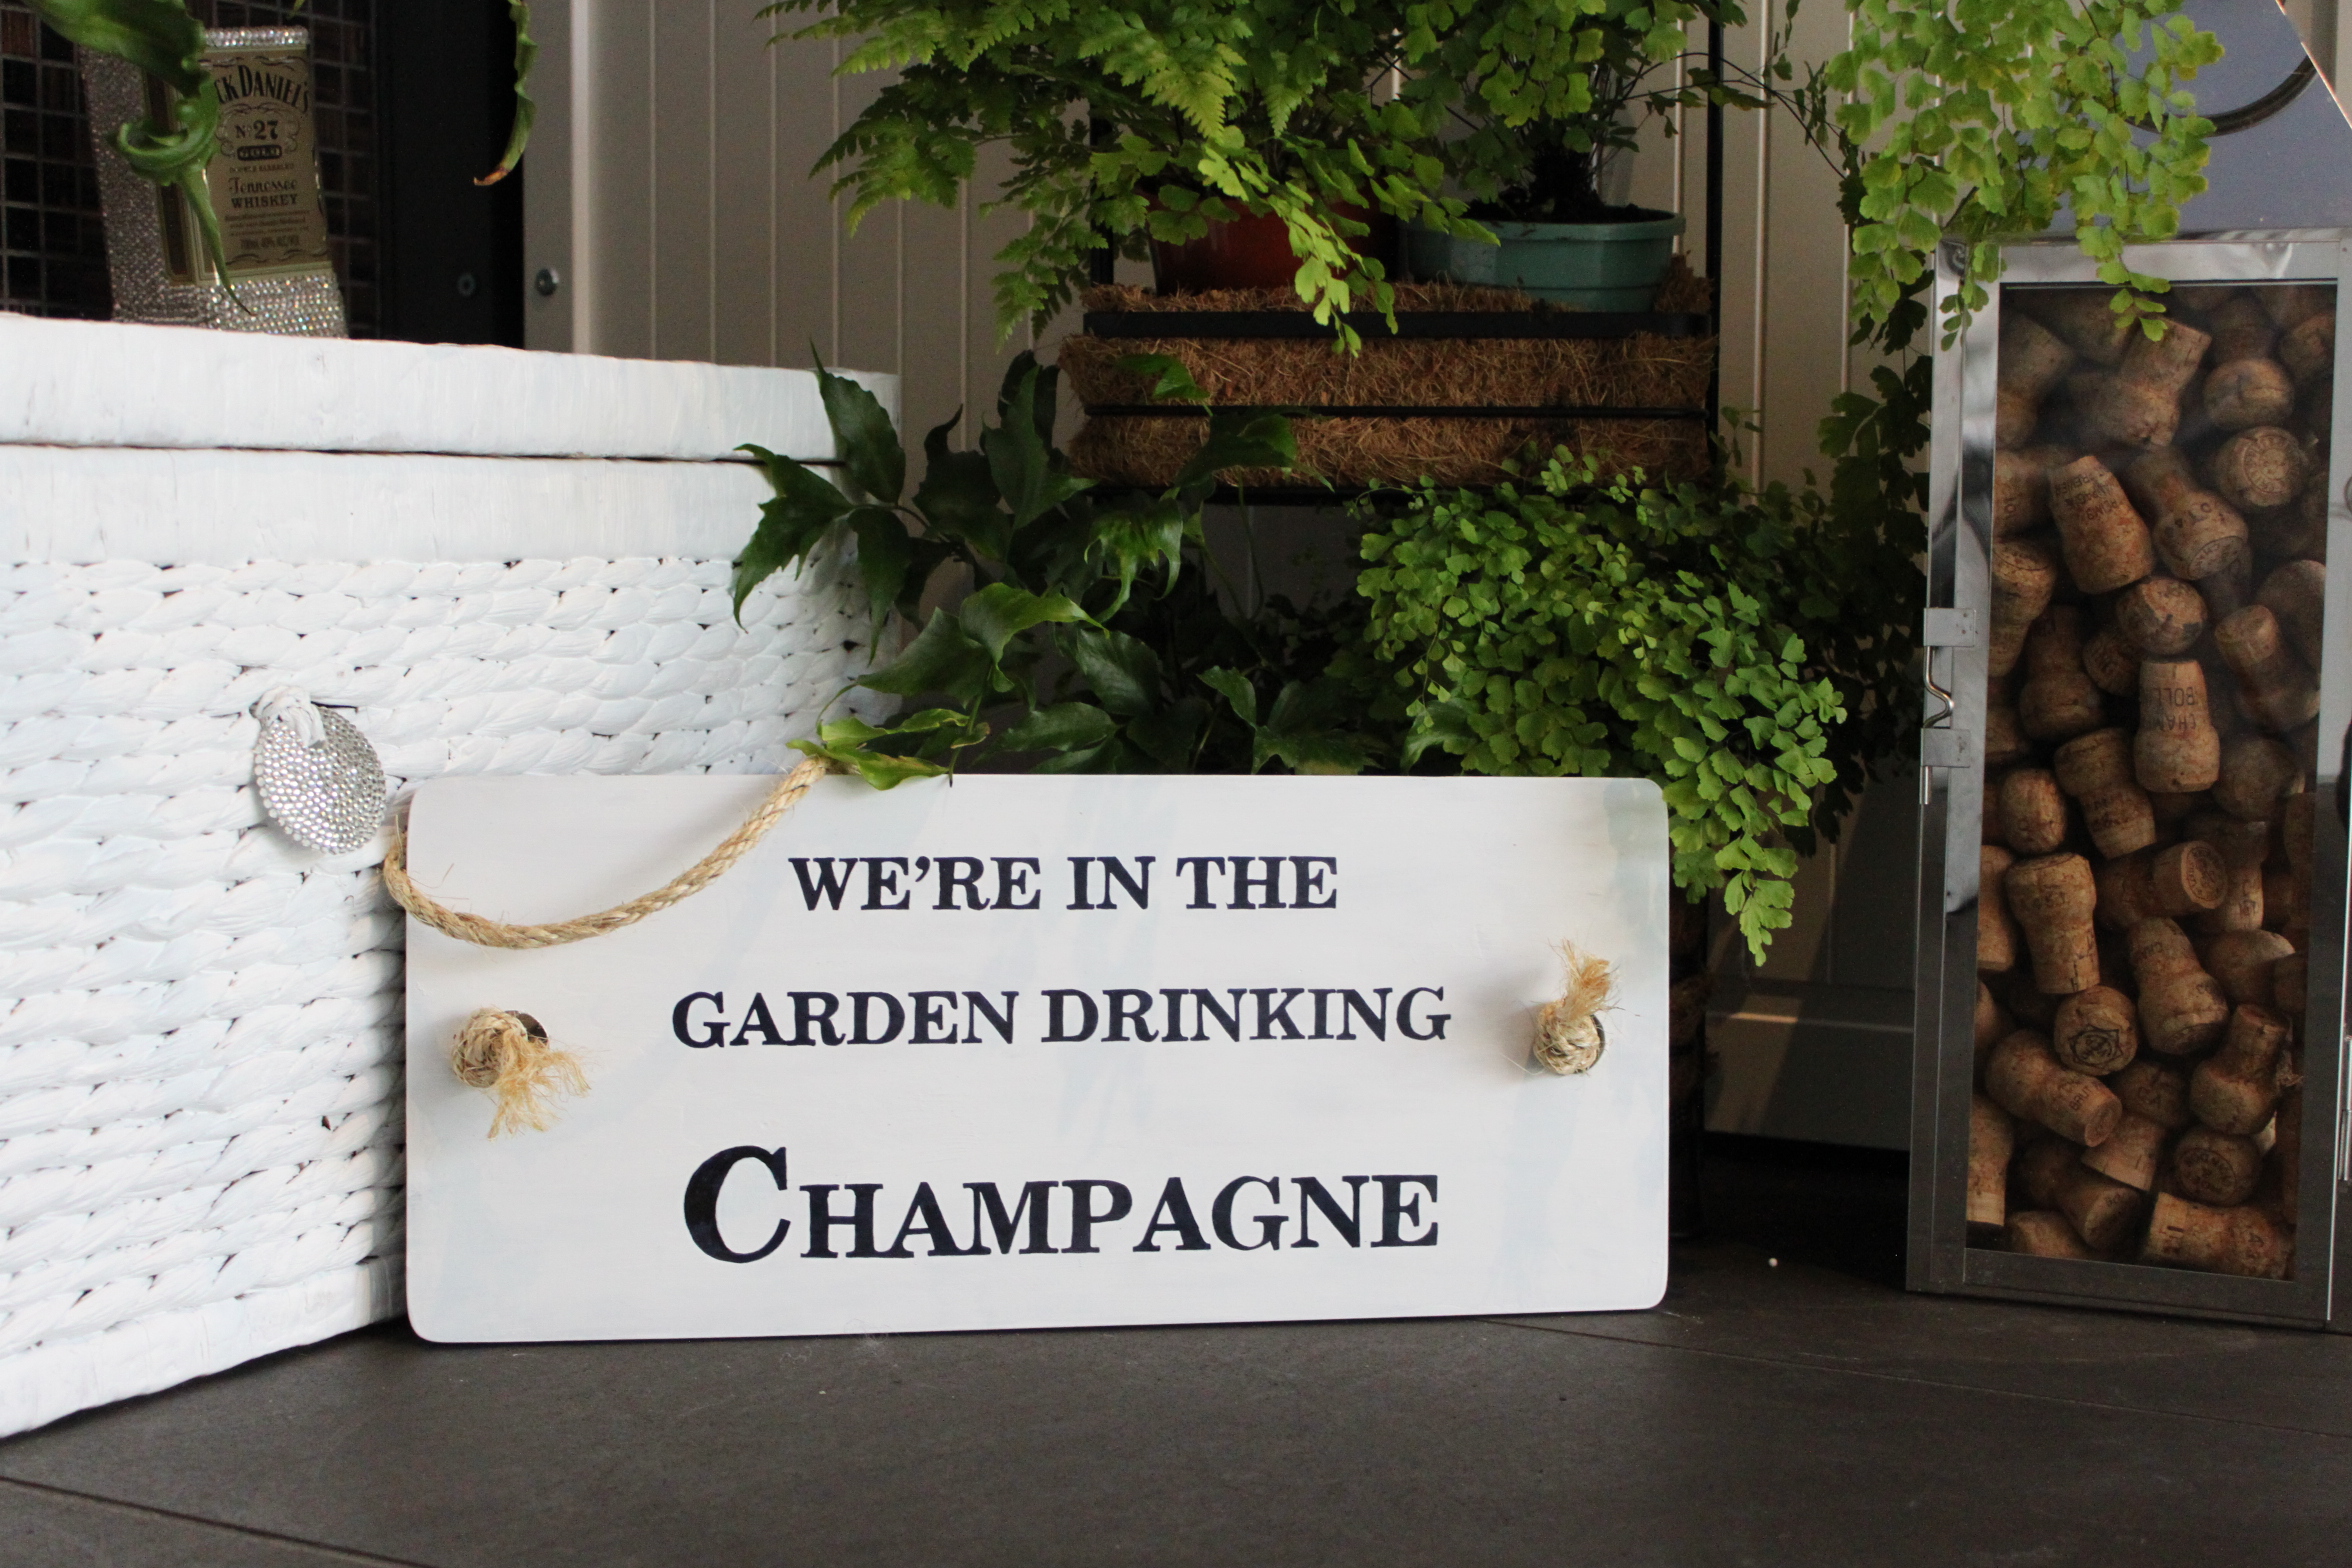
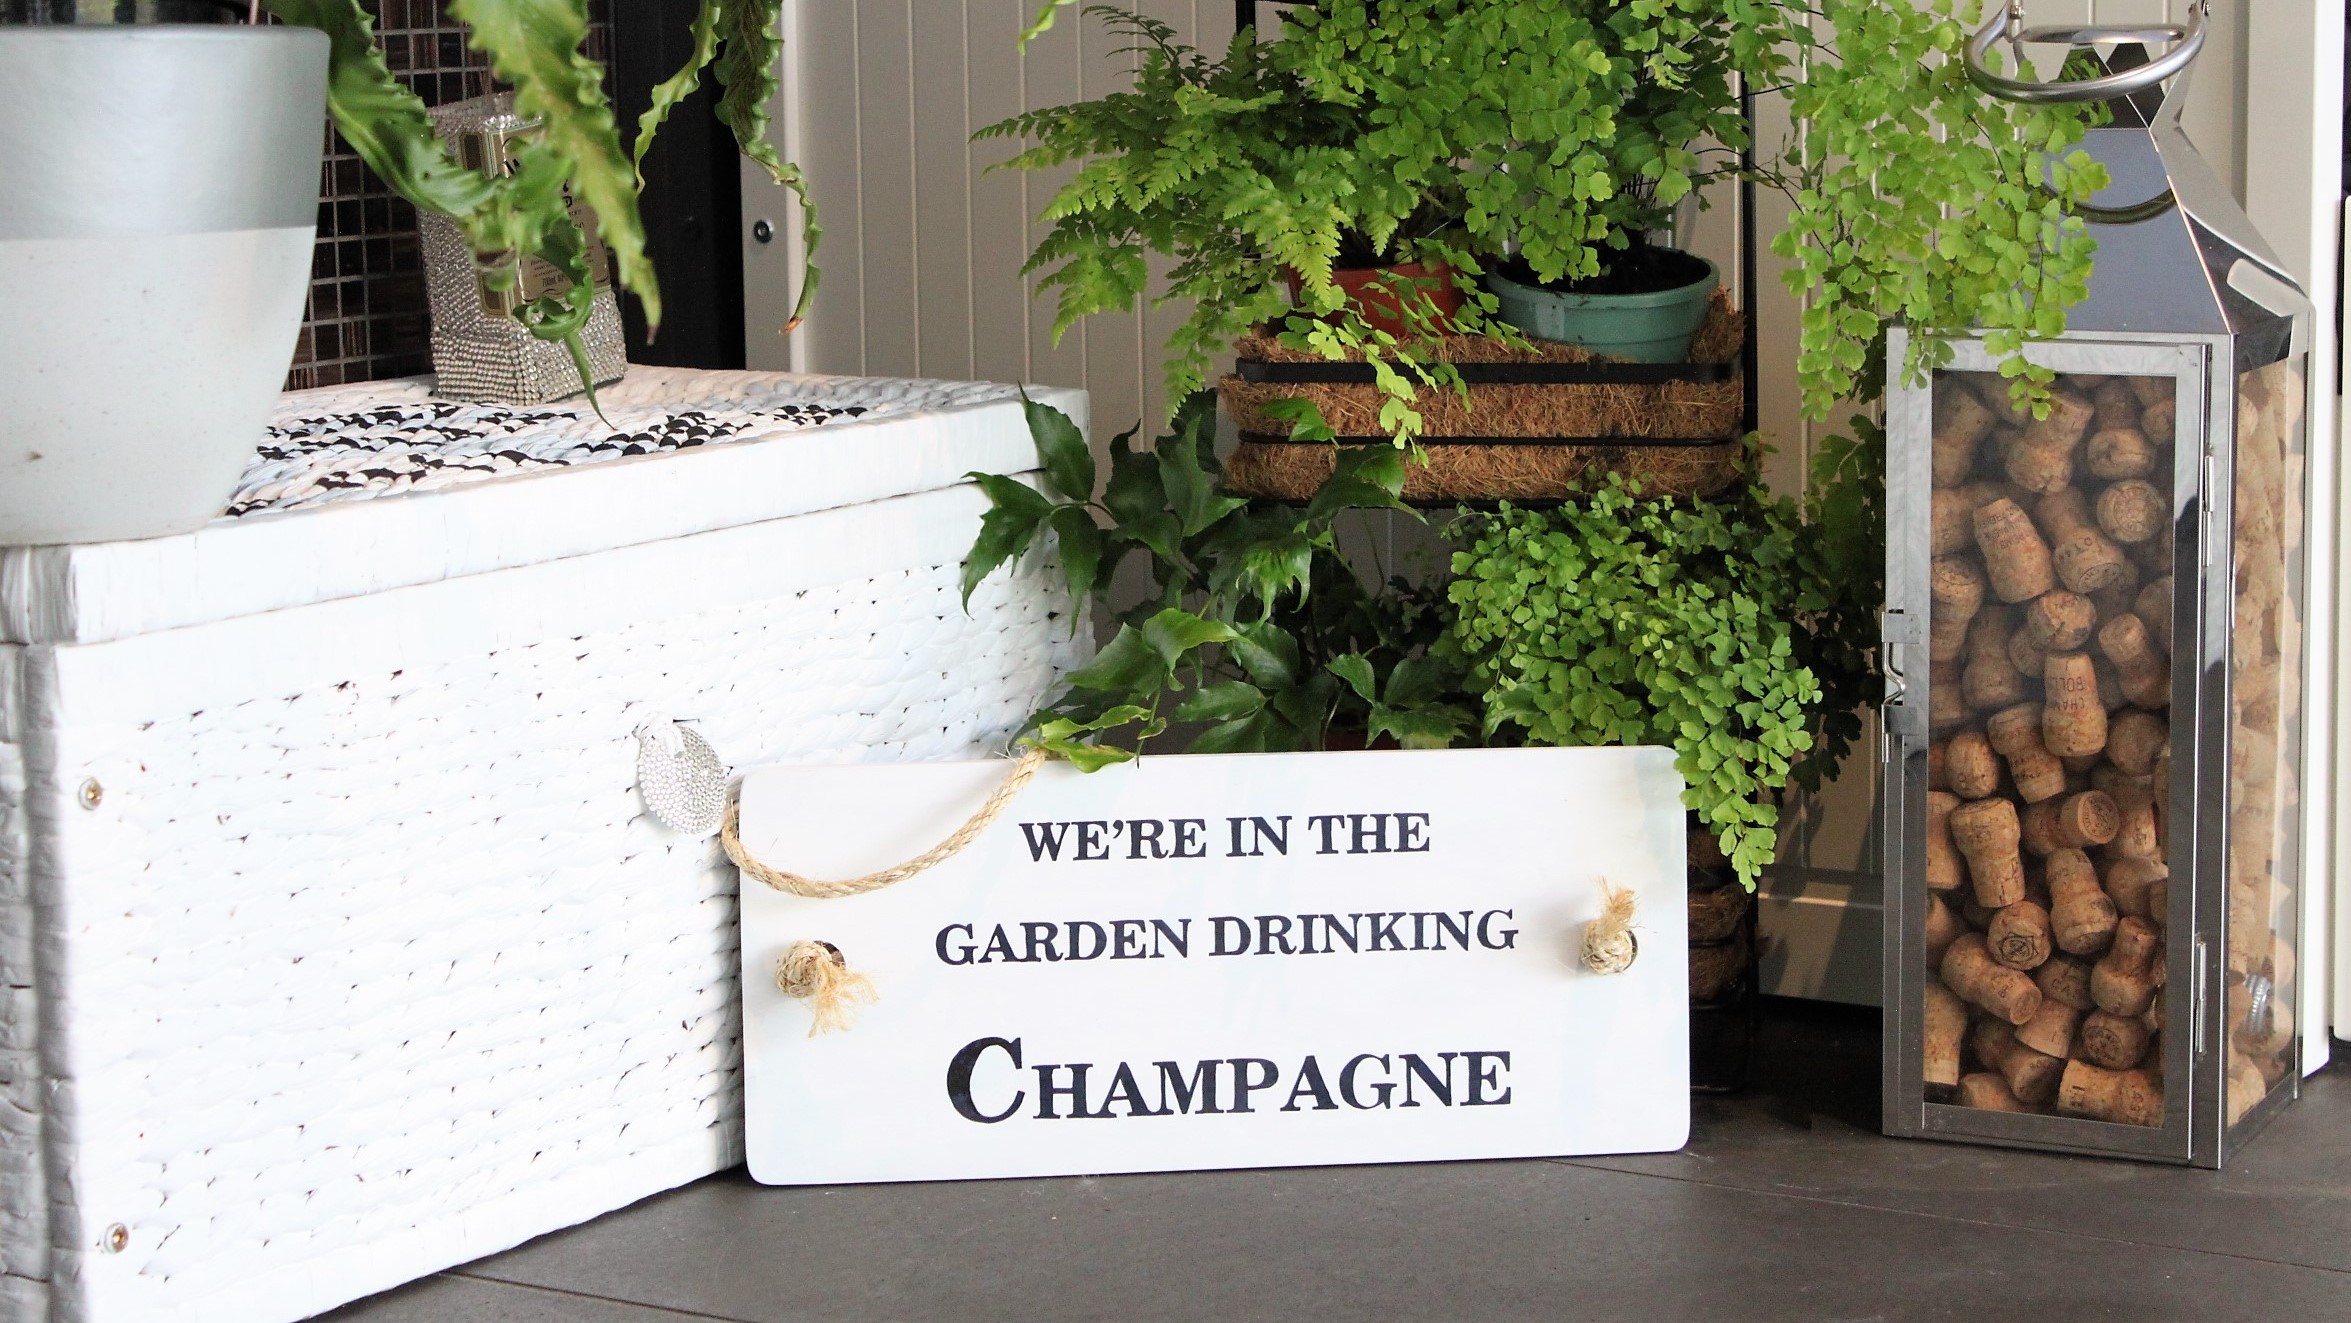
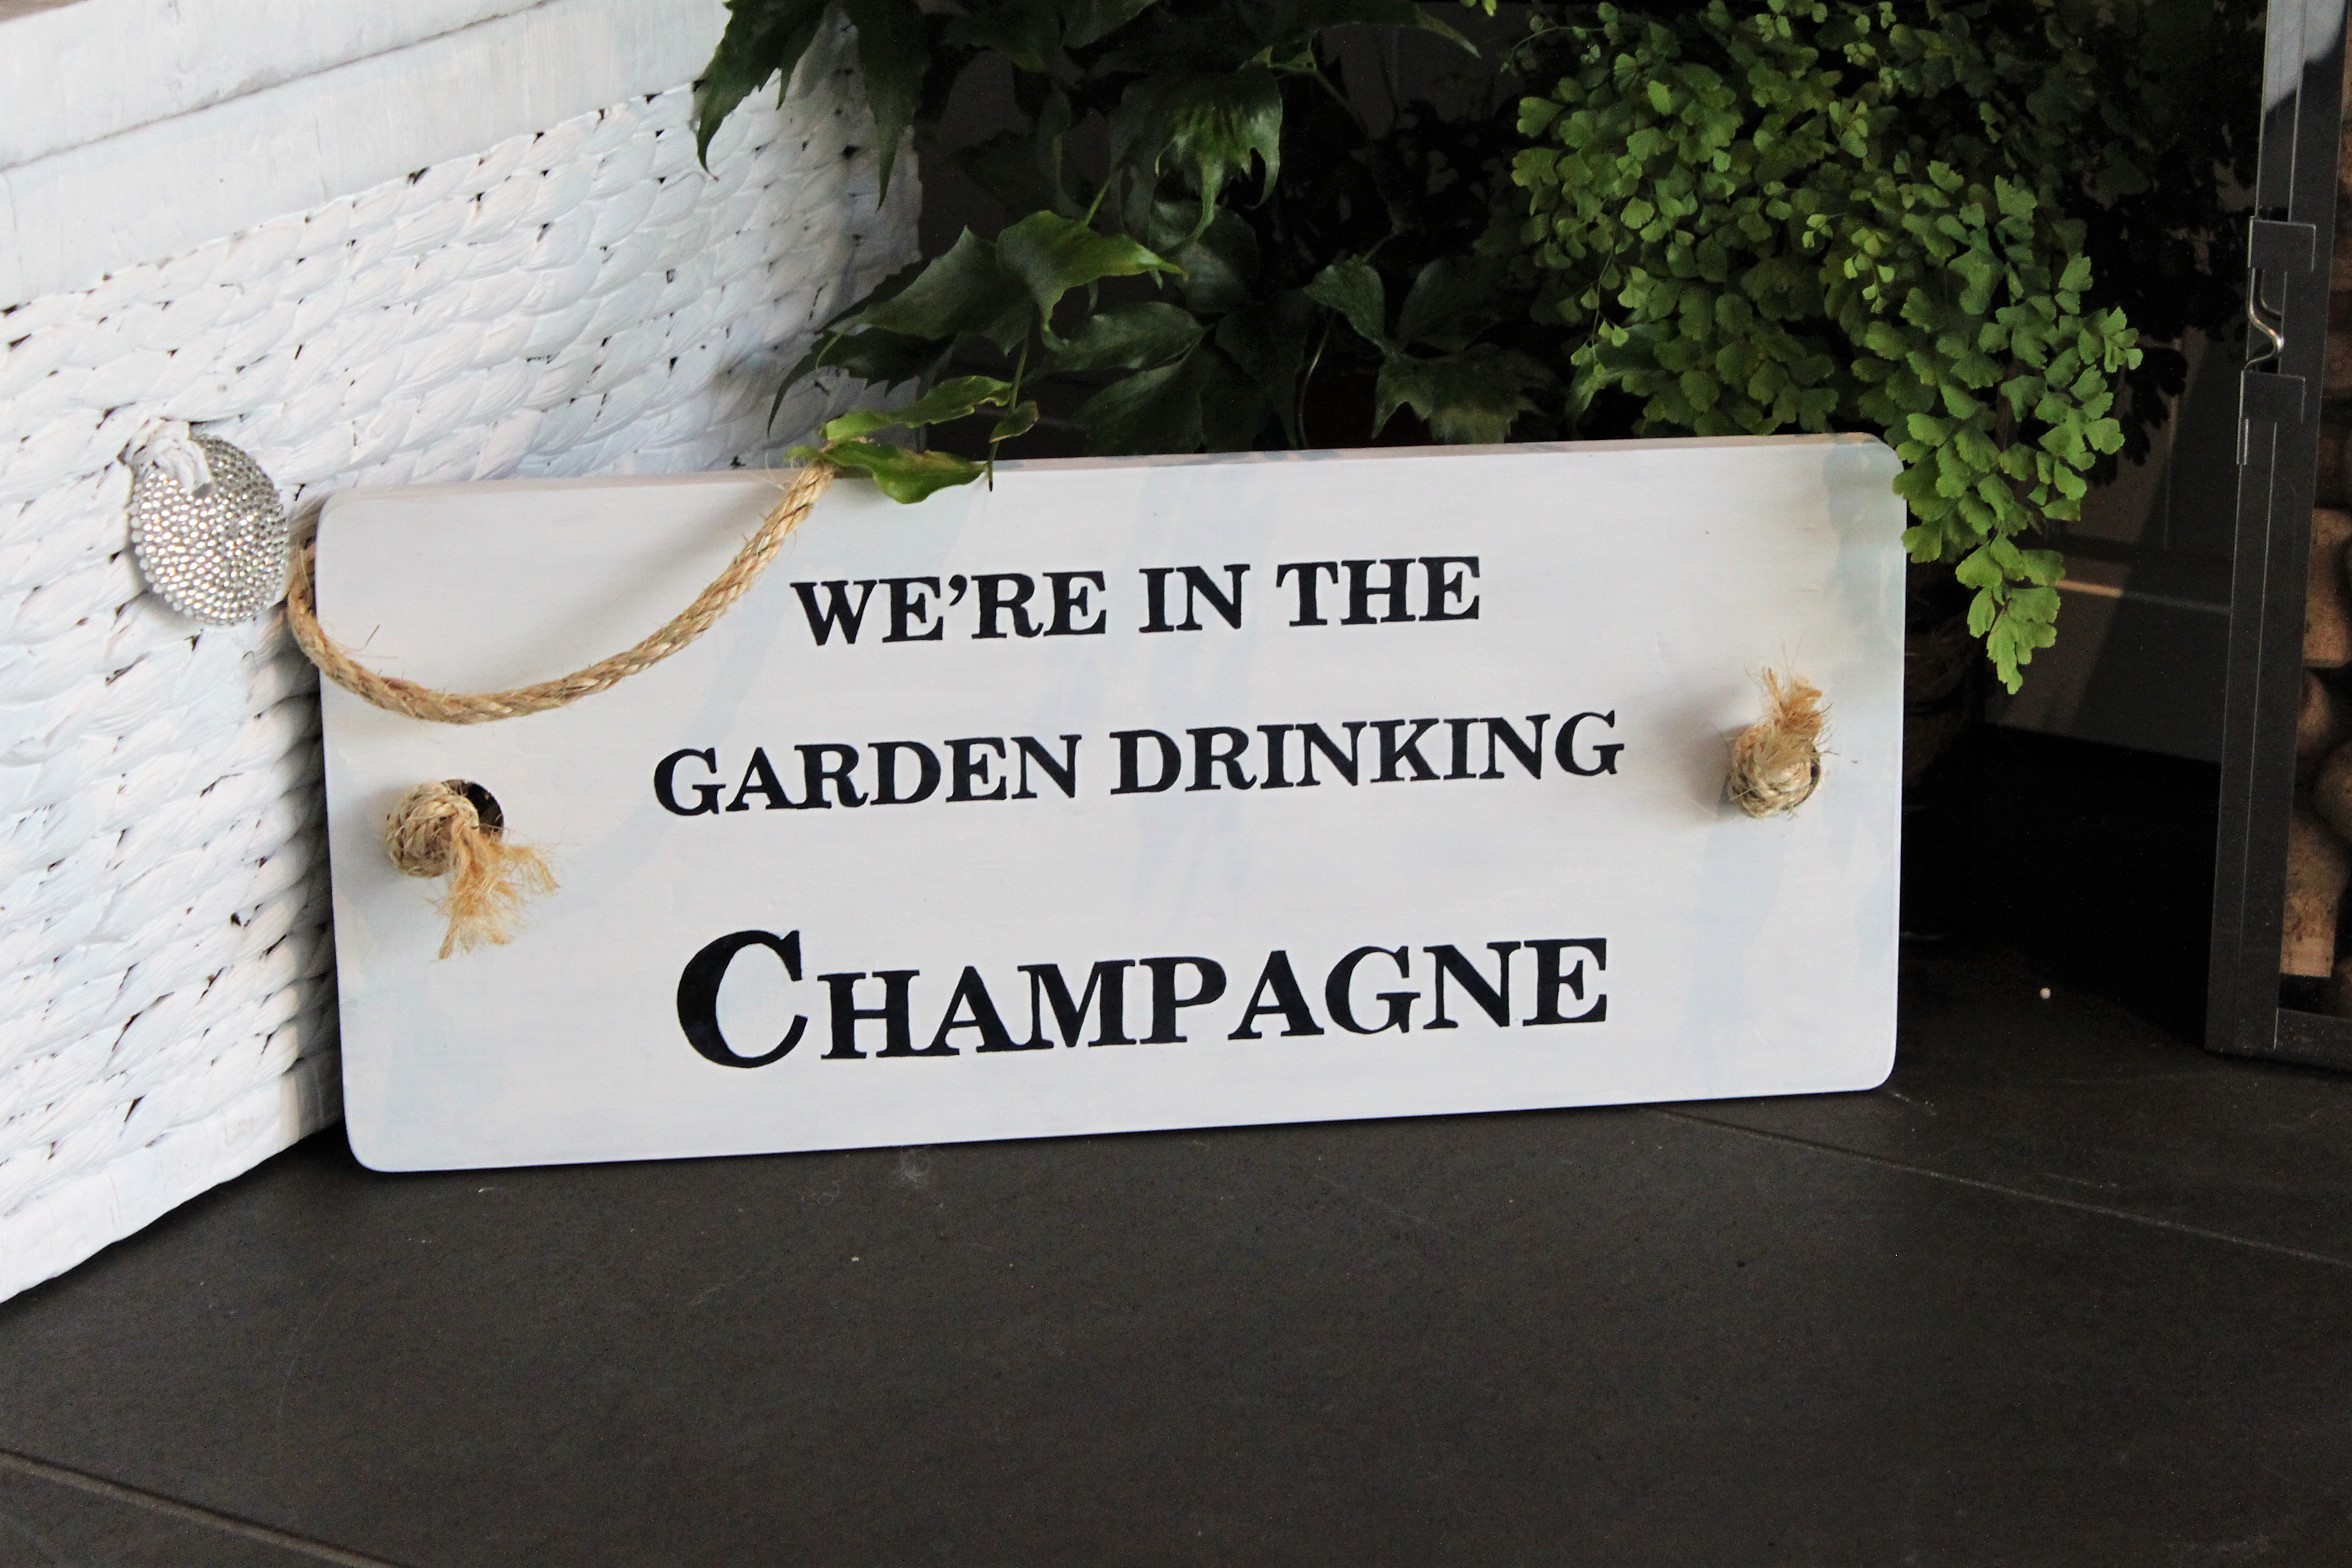
And how great does it look?!! I’ve got it sitting out by the pool for now in front of the vertical garden that I posted about last week – (if you haven’t seen that, it’s here), and the white wicker basket that I posted about a while ago (here if you haven’t seen that one).
I hope you like this project – I love it when something is super easy to do with fab end results! You could of course personalise it, use it for weddings, birthdays or bridal showers – the possibilities are endless!
If you make a version of this sign, we’d love to see it. Tag us in your social media pix using the hashtag #KmartStyling that way we get to see it and so do our followers.
Until next time,
Happy Styling!
Categories: Homewares